How To Cancel Shared Links in TeraBox | Easy Step-by-Step Guide 2025
Sharing files through cloud storage has become an essential part of our digital lives, and TeraBox stands out as a popular choice with its generous offering of free storage space. While sharing files with colleagues, friends, or family members is incredibly convenient, there comes a time when you might need to revoke access to those shared links. Whether you’ve accidentally shared sensitive information, completed a project, or simply want to maintain better control over your data, knowing how to cancel shared links in TeraBox is crucial for protecting your privacy and maintaining security.
In this comprehensive guide, we’ll walk you through everything you need to know about canceling shared links in TeraBox, from understanding why it matters to following simple steps across different devices. Let’s dive into the details and help you take back control of your shared content.
Understanding TeraBox and Its Sharing Features
TeraBox has gained massive popularity among users who need reliable cloud storage without breaking the bank. The platform offers 1024 GB of free cloud storage space, making it an attractive option for storing documents, photos, videos, and other important files. The service allows users to generate shareable links that make file distribution effortless, whether you’re collaborating on work projects or sharing memories with loved ones.
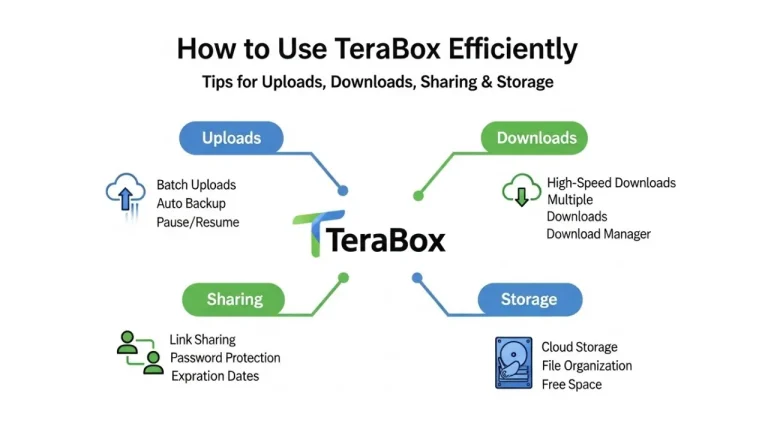
When you share files through TeraBox, you have flexible options for link validity. You can create time-limited links that automatically expire after a set period, typically ranging from 7 to 30 days, or you can generate permanent links that remain active until you manually cancel them. This flexibility is great for different scenarios, but it also means you need to actively manage your shared content to maintain security.
The beauty of TeraBox lies in its user-friendly interface that brings all your sharing management tools into one convenient location. Instead of having to delete or move files to stop sharing them, the platform provides dedicated features specifically designed for managing and canceling shared links efficiently.
Related; How To Remove Ads From TeraBox
Why You Should Cancel Shared Links in TeraBox
Managing your shared links isn’t just about organization, it’s a critical aspect of digital security and privacy. There are several compelling reasons why you might need to cancel shared links in TeraBox:
Privacy Protection: Perhaps the most important reason is safeguarding your sensitive information. Once you’ve shared a link, anyone who has access to it can view or download your files. If circumstances change or you realize you’ve shared something too widely, canceling the link immediately cuts off access and protects your data from unauthorized viewing.
Project Completion: When collaborative work wraps up, there’s often no reason for team members or external partners to continue accessing project files. Removing shared links helps maintain a clean digital workspace and prevents outdated information from being referenced or mistakenly used in future work.
Accidental Sharing: We’ve all been there, clicking the share button on the wrong file or sending a link to someone by mistake. The ability to quickly cancel these shared links can save you from embarrassing situations or potential security breaches.
Access Control Management: Your sharing needs evolve over time. You might need to change who has access to certain files, update permissions, or restrict viewing rights to a smaller group of people. Canceling old links and creating new ones with updated settings gives you precise control over your content.
Organizational Cleanup: Over time, your list of shared links can become cluttered with outdated entries. Regularly reviewing and canceling unnecessary shared links helps you maintain a tidy account and makes it easier to manage your active shares.
How to Cancel Shared Links in TeraBox Mobile App
The TeraBox mobile application makes managing your shared content straightforward, whether you’re using an Android or iOS device. Here’s a detailed walkthrough of the cancellation process:
Step 1: Access Your TeraBox Account
Begin by opening the TeraBox application on your smartphone or tablet. You’ll need to log into your account using your registered email address and password. If you originally signed up using a Google or Facebook account, you can use those credentials for a quicker login process. Make sure you have a stable internet connection to ensure smooth navigation through the app.
Step 2: Navigate to Shared Files Section
Once you’re logged in, look for your profile picture or the menu icon, typically located in the top corner of the screen. Tap on it to reveal the navigation menu. Within this menu, you’ll find an option labeled “Shared Files” or “My Shares.” This section serves as the central hub where all your shared content is organized and displayed. Select this option to proceed.
Step 3: Locate the File or Link You Want to Cancel
You’ll now see a complete list of all files and folders you’ve shared with others. Browse through this list to find the specific item whose shared link you want to cancel. The interface typically displays file names, types, and sharing status, making it easier to identify what you’re looking for. If you have many shared items, you can use the search function to quickly locate specific files.
Step 4: Select Cancel Sharing Option
Once you’ve identified the file or folder, tap on it or look for the three-dot menu icon (ellipsis) next to the item. This will open a dropdown menu with various options. Look for and select “Cancel Sharing,” “Stop Sharing,” or “Revoke” depending on how your app version labels this function. This action prepares the system to disable the shared link.
Step 5: Confirm the Cancellation
After selecting the cancel sharing option, TeraBox will display a confirmation popup to ensure you want to proceed with this action. This safety measure prevents accidental cancellations. Carefully review the notification and tap “Confirm” or “OK” to finalize the process. The shared link will be immediately deactivated, and the file will be removed from your shared files list.
How to Cancel Shared Links in TeraBox Web Version
If you prefer working on a computer or need to manage your shared links from a desktop environment, the TeraBox web version offers similar functionality with a slightly different interface:
Accessing Through Your Browser
Start by opening your preferred web browser and navigating to the official TeraBox website. Enter your login credentials to access your account. The web interface provides a more spacious layout that can be particularly helpful when managing multiple shared links at once.
Navigating to Shared Content
Once logged in, look for the “Shared” option in the left sidebar or panel. Click on this section to view all your shared files and folders. The web version typically displays more detailed information about each shared item, including creation dates, access counts, and expiration settings if applicable.
Managing Individual Links
Find the specific file or folder you want to stop sharing from the displayed list. Click the three dots next to the item and select “Cancel Sharing” from the menu that appears. The system will prompt you for confirmation, just like in the mobile version. Click “Confirm” to complete the cancellation process.
The web version is particularly useful for users who need to manage their TeraBox account alongside other work tasks or prefer the larger screen real estate for better visibility when handling multiple shares.
What Happens After You Cancel a Shared Link
Understanding the aftermath of canceling a shared link helps you make informed decisions about your file management:
Immediate Deactivation: The moment you confirm the cancellation, the shared link becomes inactive. Anyone attempting to access it will encounter an error message indicating that the link is no longer valid or has been revoked by the owner.
File Preservation: It’s important to note that canceling a shared link doesn’t delete the actual file from your TeraBox storage. The file remains safely stored in your account, accessible only to you. This means you retain full control over the content without losing any data.
Other Active Links: If you’ve created multiple shared links for the same file at different times, canceling one link doesn’t affect the others. Each link operates independently, so you’ll need to cancel them separately if you want to remove all access points.
No Notifications Sent: TeraBox doesn’t automatically notify people when you cancel a shared link. Recipients who try to access the canceled link will simply see that it’s unavailable, but they won’t receive a specific alert about the cancellation.
Best Practices for Managing Shared Links in TeraBox
Developing good habits around link management will help you maintain better security and organization:
Regular Reviews: Set aside time monthly or quarterly to review your shared links. Remove access to files that are no longer relevant or needed by others. This practice keeps your sharing activity current and reduces potential security vulnerabilities.
Use Time-Limited Links: Whenever possible, opt for links with automatic expiration dates rather than permanent ones. This ensures that access is naturally revoked after a specified period, reducing the burden of manual management and providing an extra layer of security.
Password Protection: For sensitive documents, consider adding password protection to your shared links. This adds an additional authentication layer, ensuring that only people with both the link and the password can access your files.
Descriptive File Naming: Use clear, descriptive names for files and folders you plan to share. This makes it much easier to identify items later when you need to review or cancel shared links.
Documentation: Keep a simple record of what you’ve shared, with whom, and why. This can be as simple as a text file or spreadsheet that helps you remember the context of each share when you’re doing cleanup later.
Avoid Public Platforms: Never post TeraBox shared links on public forums, social media, or other widely accessible platforms unless the content is truly meant for public consumption. Private sharing maintains better control over your content.
Troubleshooting Common Issues
Sometimes you might encounter challenges when trying to cancel shared links. Here are solutions to common problems:
Link Still Accessible: If a canceled link appears to still work, try refreshing your shared files section and verifying the cancellation. Log out and back in to ensure the changes have properly synced. If the problem persists, check if there might be multiple links to the same file.
Cannot Find Shared Files Section: If you’re having trouble locating where your shared files are listed, look for menu items like “Share,” “Sharing,” “My Shares,” or “Shared Links.” The exact label might vary slightly depending on your app version or device.
App Not Responding: If the TeraBox app becomes unresponsive when you try to cancel shares, close it completely and reopen it. Make sure you’re running the latest version of the app by checking for updates in your device’s app store.
Multiple Links to Cancel: Currently, TeraBox requires you to cancel shared links individually. The platform does not provide a bulk canceling feature, so you’ll need to process each link separately. While this takes more time, it also ensures you don’t accidentally revoke access to files you still want shared.
Additional Security Features to Consider
Beyond canceling shared links, TeraBox offers other features that enhance your file sharing security:
Download Limits: You can set restrictions on how many times a file can be downloaded through a shared link. This is particularly useful for controlling the distribution of sensitive or proprietary content.
Link Expiration: Make use of automatic expiration settings when creating new shares. This ensures links don’t remain active indefinitely and reduces the risk of forgotten shares becoming security vulnerabilities.
Access Monitoring: Regularly check your account activity to see who’s accessing your shared files. This helps you identify any unexpected access patterns that might require immediate action.
Two-Factor Authentication: Enable two-factor authentication on your TeraBox account for an additional layer of security. This protects your account from unauthorized access, which in turn protects all your shared content.
Frequently Asked Questions
Can I restore a canceled shared link? No, once you cancel a shared link, it cannot be reactivated. However, you can easily create a new shared link for the same file if needed. The new link will have a different URL than the previous one.
Will people be notified when I cancel a link? No, TeraBox doesn’t send notifications to people when you cancel shared access. They’ll only discover the link is inactive when they try to use it.
Does canceling affect file collaborators? If others have already downloaded the file before you canceled the link, they’ll retain their downloaded copies. Canceling only prevents future access through that specific link.
Can I cancel links from both mobile and web? Yes, you can manage your shared links from any device where you can access TeraBox, whether that’s through the mobile app or web browser. Changes sync across all platforms.
What if I accidentally cancel the wrong link? Simply create a new shared link for that file and send it to the intended recipients. While you can’t undo the cancellation, generating a replacement link is quick and straightforward.
Conclusion
Taking control of your shared content in TeraBox is essential for maintaining privacy, security, and organization in your digital life. Whether you’re using the mobile app or web version, the process of canceling shared links is straightforward and takes just a few moments. By regularly reviewing your shared files, using time-limited links when appropriate, and following the best practices outlined in this guide, you can ensure that your important documents and files remain accessible only to the people you want, for exactly as long as you want.
Remember that file sharing is a powerful tool, but with that power comes the responsibility to manage access appropriately. Make it a habit to audit your shared links regularly, cancel those you no longer need, and always think twice before creating permanent links for sensitive content. With these practices in place, you can enjoy the convenience of TeraBox’s generous storage and sharing features while maintaining complete control over your digital assets.
Stay secure, stay organized, and make the most of your TeraBox experience by mastering the art of shared link management.